Thermistor String Construction
This is a short explanation of how I have been going about creating thermistor strings. It seems to work well and is fairly straight forward. I will start with some information about material selection. The type of cable you select will depend on where you will be using your thermistor string. If it is going in a dry borehole then you can most likely use basic instrumentation cable with a PVC jacket. If the cable is to be buried in the ground you might want to use some cable designed for direct burial. You will need a cable that has at least 1 more conductor than the number of thermistors you wish to have. The choice of thermistors is up to you but I have been quite happy with the PS103J2 from US Sensor. It is a 10K ohm NTC thermistor with an interchangeability of 0.1°C. The other main component is some heat shrink tubing with adhesive inside for a waterproof connection. My favorite is (NSPA-HST540C-48) high flow adhesive heat shrink with a 4:1 shrink ratio. It comes in 4 different sizes and is clear so you can inspect your work after you are done.
Construction Steps:
- Start by figuring out how long I want the string to be and where the thermistors should be. Then cut your cable to length leaving enough extra for connection to your datalogger.
- Mark the location of all the thermistors. I find it is helpful to number them and create a wiring diagram with the color code for each depth.
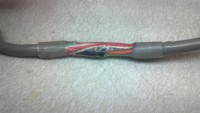
- Cut pieces of the high flow adhesive heat shrink at least 2cm longer than the window you cut (step 4) and slide them onto the cable positioning them near the thermistor locations.

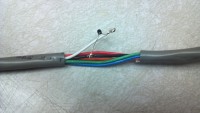
- At the first thermistor location cut a small window (2-3cm) centered on your thermistor location. Be careful to remove only the cable jacket and any shielding.

- Locate the wires you will attach the thermistor to. You will need one common wire for all the thermistors and one specific wire for every thermistor.
- With the common wire you will need to remove the insulation without cutting it. This can be done carefully with a razor blade or exacto knife. The specific wire for the thermistor can be cut since it will only be used for this thermistor.
- Solder one leg of the thermistor to the specific wire and the other leg to the common wire. Add some regular heat shrink to the specific wire.
- Position the thermistor so it is approximately in the middle of the window you cut in the cable and slide the high flow adhesive heat shrink over the window and shrink into place.
- Now simply repeat steps 4 to 8 for each thermistor on the string.
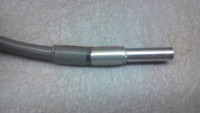
- For the thermistor at the end of the string I will typically encase it in a short lenght of aluminum tubing and fill the tubing with epoxy.
- Depending on the length of your string and where you will be installing it, it might be helpful to add some lead fishing weights to the end to help pull it straight.


